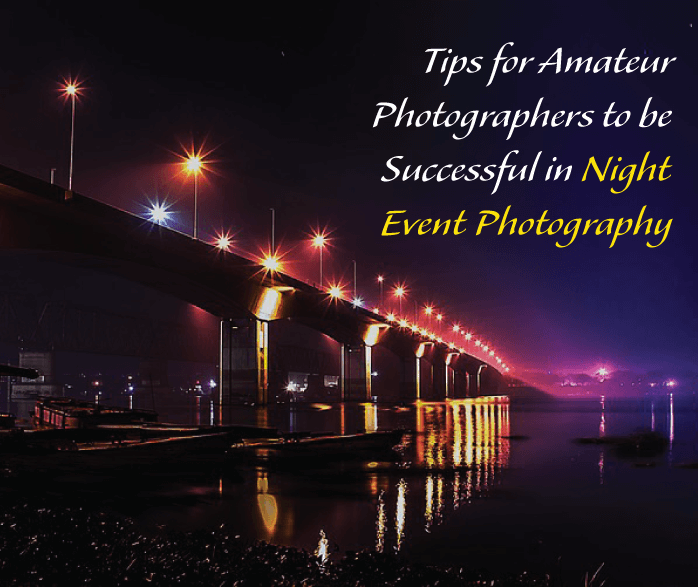
‘Getting thorough knowledge and insights of a particular subject is the only way to master it.’ As an amateur real estate photographer, learning these 7 vital tips would give a platform to practice real estate photography, facilitates you in clicking high-quality photographs, gives a right path to improvise and build career as a real estate photographer.
Here are 7 Vital Tips for Amateurs
1. Get Your Camera Settings to Manual
When you set the camera into a manual mode, you can get the complete control of an exposure. As a result, it is important to understand the 3 basic settings, to ensure your real estate photographs are effective and satisfactory to the clients.
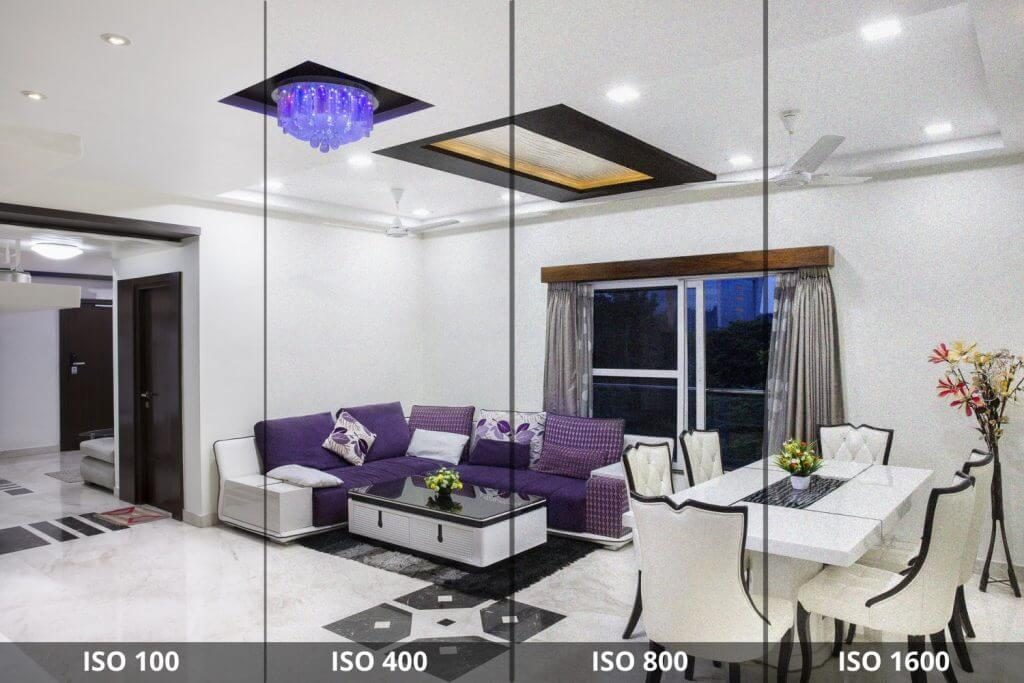
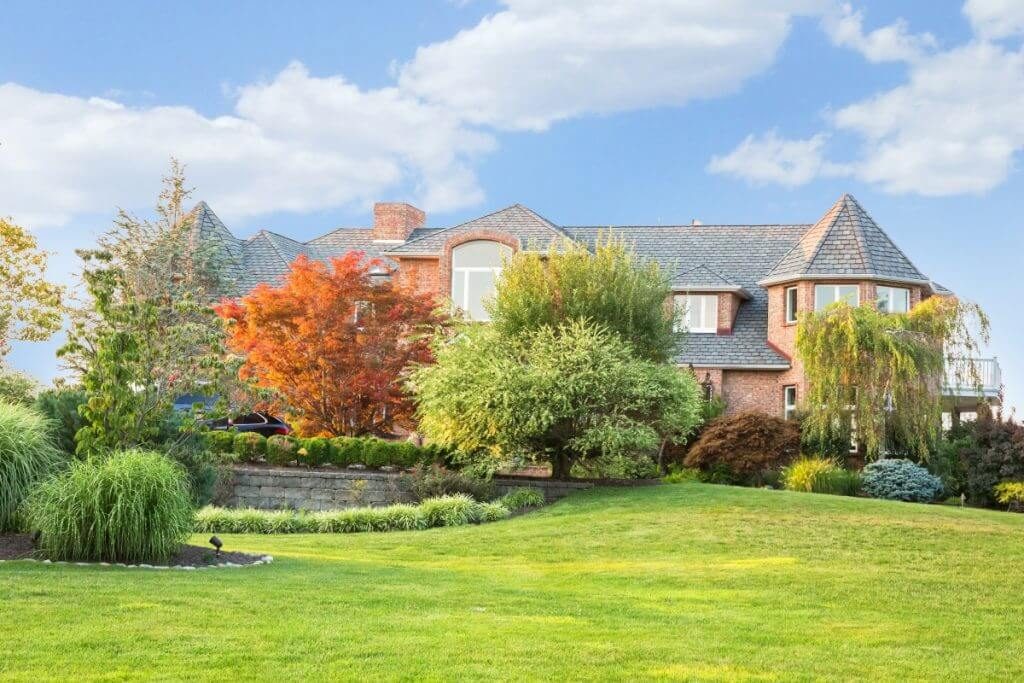
- ISO – This handles the camera’s sensitivity to the light. Lower ISO decreases the sensitivity, whereas higher increases. But, increasing ISO creates noise in the image. You must know that the photos of the indoors/interiors of a home should come clean as possible. So, it is better to use the ISO between ‘100 to 400’. But, customizing to these settings makes the room darker since we have set to lower ISO. Subsequently, you can also notice the image coming very clean. Now, how to solve the lighting issue? This will be solved when you read the shutter speed approach.
- Shutter Speed – How long your lens stays open is known as shutter speed. Longer time allows more light to come in. Since there is nothing to freeze the motion, when photographing an interiors/indoors of a real estate home; setting it to slower shutter speed between 0.25s to 0.5s is best. But, make sure you are clicking with a tripod to prevent blurriness in the images. Hence, here lighting issue is solved by using slower shutter speed settings, which allows more light to come in to the lens and gives proper exposure to indoors.
- Aperture – It handles the depth of field. The size of an aperture resembles the amount of light entering the lens. If it is a larger aperture, it allows more light to come in the lens. But, creating a shallow depth of field when you keep enlarging aperture (lower sharpness). Smaller aperture does quite the opposite, by allowing lesser light and creating a larger depth of field (better sharpness). In real estate photography, we need the images to be sharp enough and bring an entire room in to focus. So, it is better to use the aperture between f/7.1 to f/11.
By setting lower ISO 100, the image comes clean (no noise). So, it is better not to increase the aperture beyond f/11 and use a slower shutter speed of 0.25 to get accurate light. This can be the settings to get the above like picture.
Most of the professional photographers usually set their camera settings into a manual mode; as they can click based on their viewpoints, and also on the client’s requirement.
Note 1: This setting is for interior real estate photography.
Note 2: Once you know and clearly understand the basics of these 3 settings; you can easily manage and alter on your own based on the lightings inside the room.
Note 3: If you are altering one of the 3 settings, you have to alter the other 2; to get proper exposure.
Professionalism comes when; photographing several homes, adapting to the various lightings of an indoor environment, by ‘altering and experimenting’ the 3 pillars (ISO, Aperture, Shutter speed) of a camera based on the lightings to get desired exposure.
A photographer, dedicated to achieving a particular goal by experimenting and customizing various settings to get the perfect exposure.
Do not worry when your photography goes wrong. As you experience more, the mistakes got to be less. But, you cannot deliver faulty images to your clients, as it leads to dissatisfaction. Hence, photo editing service provider can play a handful role in delivering the right quality enhanced images, through proficient photo editing.
2. Use Wider Angle Lens
While capturing interiors of a home it is required to use wider angle lens to get complete information of the rooms, hall, kitchen etc. Using Canon’s 10-22mm or Nikon’s 10-24mm would be ideal to photograph real estate homes. Here are some best wide angle lenses for real estate photography. These are expensive but worth buying it, as it would be a one-time investment for photographers who are serious about real estate photography. There are also some wide angle lenses which are budget-friendly, and initially good for beginners to learn real estate photography.
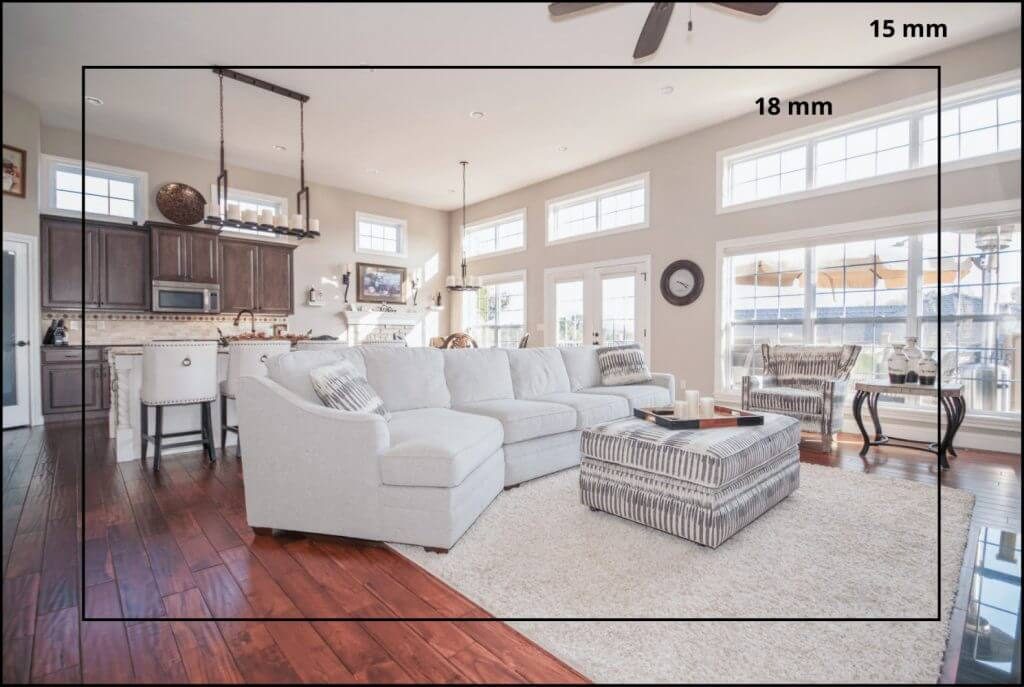
Wide angle lenses give more information as possible.
3. Make Sure You Understand Your Client’s Requirement
Client might be an agent or a house owner; whoever, is available, speak to them. Ensure, you ask if there are any key area which needs to be photographed (unique selling proposition – USP).
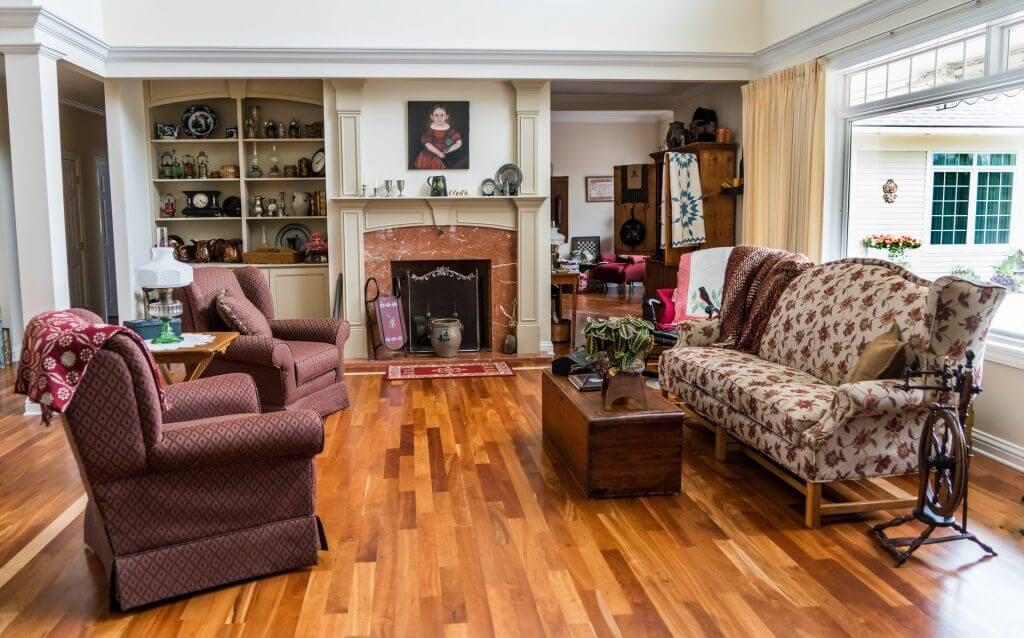
4. Ensure the Room is Organized and Neat
Make sure nothing is disturbing such as clothes, papers, or any other materials hanging in the room. Ensure furniture is arranged properly, all the lights are turned on to look appealing and warming.

A genuine photo of a real estate

A disturbing object is removed from a sofa and digitally enhanced to look warming and appealing.
Thus, photo editing plays a remarkable role and is must to learn for photographers.
Note: Being an amateur photographer, the goal must be to learn photography; become professional and prominent in your chosen field.
‘Focusing on one particular goal can help you achieve great heights than focusing on two goals simultaneously.’ So, once you become professional at real estate photography, it is better to jump over and learn photo editing techniques. Until then, handing over the images to a well versed photo editing service provider would be a good idea. Photo Editing Experts ensures all your real estate images are digitally enhanced, to get it better exposed and appealing.
Note: The experience comes when you accept the client’s requirement while learning.
Though being an amateur photographer, never miss business opportunities which come to you as it gives plenty of experience and, an opportunity to learn your mistakes during the photography session.
5. Look for Beautiful Composition
Have a thorough glance at the room, and create a blueprint by noting down your best viewpoints. Always, click photographs of a room with more than one perspective. This gives your client more choices.
6. Click When the Weather is Ideal for Photography
Usually, photographers choose shooting during daylight when the weather is clear with blue sky, as the images look perfectly exposed. But, sometimes, the day might not be good for photographers as the sky is cloudy, and client urgently demanding the photos of a home for online listings. During these situations, Photoshop is the real player; which replaces overcast, white skies with a clear blue sky. To learn about sky replacement, watch a video which is beautifully explained by Virtual Impact.
An original photo which was clicked
Then, the image is post-processed by looking at its overall perspective. For example, replacement of white sky with blue, proper positioning of the tilted image, color enhancements.
A manipulated image by our graphic designing experts
If you are busy, and your business photos need to be delivered on time with good quality; get help from photo editing specialists who ensures the photos are skilfully manipulated based on your requirements.
7. Learning Post Process Photo Editing is Vital
Clicking photos is just half the process. Most professional photographers utilize photo editing tools to enhance their images, get better quality, and to warrant better rates for their work. So, it is important to learn various photo editing tools which are important for real estate photography. Here are some of the videos by Rich Baum where you can learn real estate photo editing tricks and tips.

Post processed images look attractive and appealing
Subsequently, as a photographer; practicing with manual mode would help you to build proficiency, and deliver photographs as per the client’s needs. Utilizing wider angle lens assist you in getting more information about the indoors/interiors. Having more than one perspective of rooms/interiors gives a client with choices for online listings. Learning photo editing, or delivering your images to photo editing providers will help you in getting better image quality and also giving the license to charge the image prices high.